
|
|
Manual |
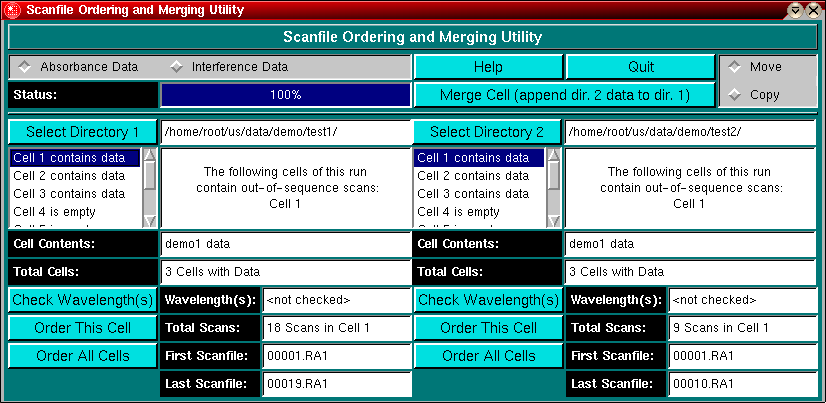
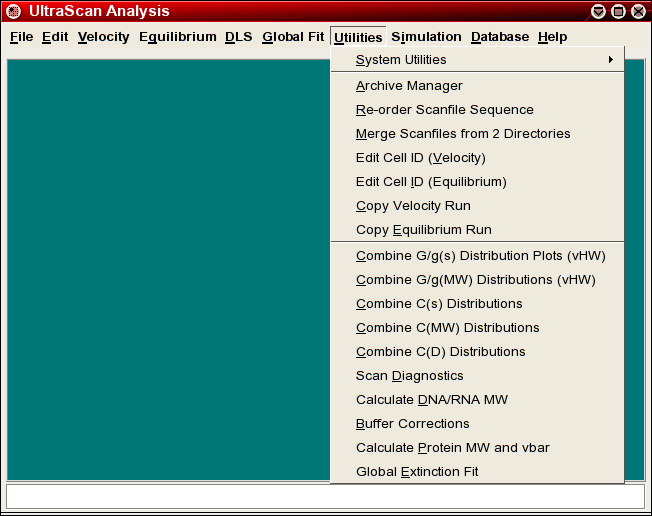
The Scanfile Merging and Re-ordering Utility can be loaded from the Utility Menu in the Main Menu section of UltraScan. With this module you can fix corrupted archives of raw data files acquired with the Beckman Data Acquisition software, and merge two datasets that have been disconnected due to interruption of data acquisition. This can be caused either by software or instrument failure, or by not allowing sufficient time for a slowly sedimenting sample to scan to completion. If you start a new methods scan, the two datasets will end up in different directories and have disjointed scan sequences. By merging these datasets into a single directory you can treat them with UltraScan as if they were acquired in a single run. There is no limit to the number of datasets that can be merged in this fashion, as long as the merging is performed in the sequence in which the datasets were acquired. In addition, on occasion file collection fails for a file in the sequence or one or more files end up missing for various reasons, creating "holes" in the sequence. The UltraScan software expects all files to be in proper sequence, and this utility allows you to reorganize a Beckman Data Acquisition data directory such that all files are in the proper sequence expected by UltraScan.

|
select the type of data to be merged or re-ordered. Depending on the optical system selection, the file suffixes differ (interference = *.ip* and absorbance = *.ra*) and need to be dealt with separately.
Displays the status of various file operations, such as file checking, merging and sorting. |

|
This Help file.
Exit the program.
Perform the merge operation. Neither the source nor the target data has to be in sequence for the merge operation to succeed. Source data that may be out of sequence will automatically be re-sequenced before being added to the target directory in sequence. The sequence in the target directory will continue with the last existing scan present before merging.
Selects if the source data is moved (original deleted) or copied (original retained). The default is the move operation. |
|
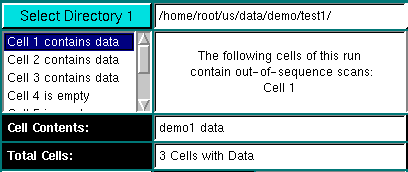
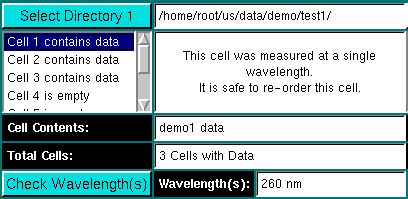
Select the directories to be merged with this utility. By definition, Directory 1 will always be the target directory, and Directory 2 will contain the source data to be added to the data in Directory 1. If either directory contains out- of sequence data or corrupted data you can reorder the contents before merging. ll scan files to be reordered need to be located in the same sub-directory. After selection of the directory, the selected directory will be displayed in the directory panel and all files residing in the selected directory will be checked for contents and sequence. As soon as the file check has completed, all fields will be updated with the corresponding values for the files in the selected directory. The default cell to be displayed will be the first cell in the sequence that contains data. See "Cell selection box" for more information on how to display information for a particular cell. The directories do not have to be on the same file system for the merging or reordering process to succeed.
When the data directory is selected, all possible cell positions (1-8) are examined for the presence of data. If data are found in a particular cell, it will be displayed with "Cell x contains data", otherwise, it will be listed as "Cell x is empty". Clicking on the desired cell will update all fields with the corresponding information for this cell.
The Message Box provides instructions to user about the steps required to order cells as well as information about the status of the program and properties of a selected cell.
This panel will show the contents of the selected cell as entered in the Beckman Data Acquisition software.
The number of cells contained in this run. It is expected that each directory only contains a single run, i.e., all cells and scanfiles located in a selected directory have to belong to the same experiment. |
|
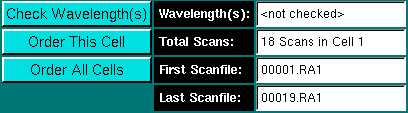
Clicking on this button will check for the presence of multiple wavelengths (disabled for interference data) in the selected cell. All wavelengths that have been used to collect data in this cell will be listed here. Note: If the cell contains data collected at multiple wavelengths, this program is not useful, unless the wavelengths are very close together and were not selected to be different, but resulted from inaccurate positioning of the diffraction grating. After checking, the dialog will be updated to indicate the result of the checking operation. If absorbance data for different wavelengths were collected, the message window will display the following message:
If all scans were measured at the same wavelength, the following message will be displayed: For in-sequence scans:
For out-of-sequence scans:
After clicking on "Check Wavelength(s)", all wavelengths used to measure the selected cell are displayed here.
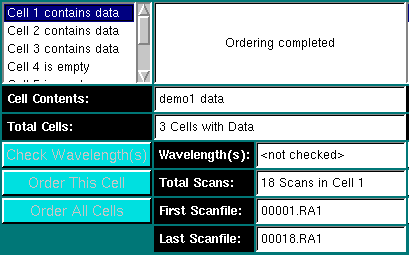
Re-order the scan file sequence for the selected cell. The program will not check automatically if the cell was acquired at different wavelengths. The user has to do that manually. After reordering, the dialog will be updated to indicate the result of the ordering function. After ordering, the check wavelength and ordering buttons will be disabled.
Order the scan file sequence for all cells. The program will not check automatically if the cell was acquired at different wavelengths. The user has to do that manually. After reordering, the dialog will be updated to indicate the result of the ordering function. After ordering, the check wavelength and ordering buttons will be disabled.
The number of total scan files found for the selected cell is displayed here.
The first scanfile found for the selected cell is shown here. If the filename doesn't display 00001.
The last file containing data found for the selected cell. If the number of the prefix in the scan file name does not agree with the number shown in total scans, the run contains out-of-sequence scan files and should be reordered. In this case, there are 18 scan files available, but since the scans start at 00001.RA1 and end at 00019.RA1, there clearly is one scan file missing in the sequence. |
This document is part of the UltraScan Software Documentation
distribution.
Copyright © notice.
The latest version of this document can always be found at:
Last modified on January 12, 2003.