
|
|
Manual |
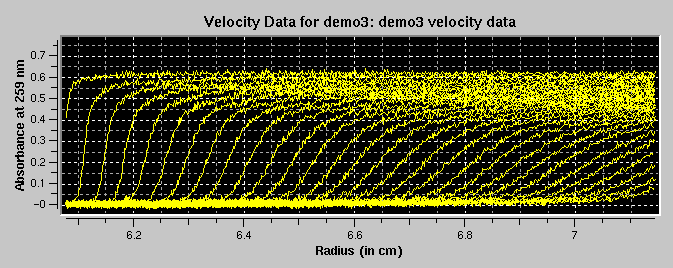
The purpose of this routine is to allow editing of experimental data with flaws such as spikes and scratches. These imperfections occur from time to time, either due to electrical noise in the data acquisition system, due to failed lamp flashes, missing CCD points or scratches in the cell windows. Eliminating such imperfections is appropriate as long as the overall shape of the concentration gradient is not altered.
To edit the spike in scan 13 from this example, click on the single-arrow counter button until it reads "13". The selected scan will be highlighted in purple to assist you in finding the appropriate scan.
If you click on the double- or triple-arrow buttons, you can move around in steps of 10 or 100, which may be useful if you have a large number of scans in your dataset; keeping the mousebutton depressed on the arrow buttons will update the counter without redrawing the screen until the button is released. This trick avoids lengthy redraws on slow video cards, which can be especially important if your dataset contains many scans.
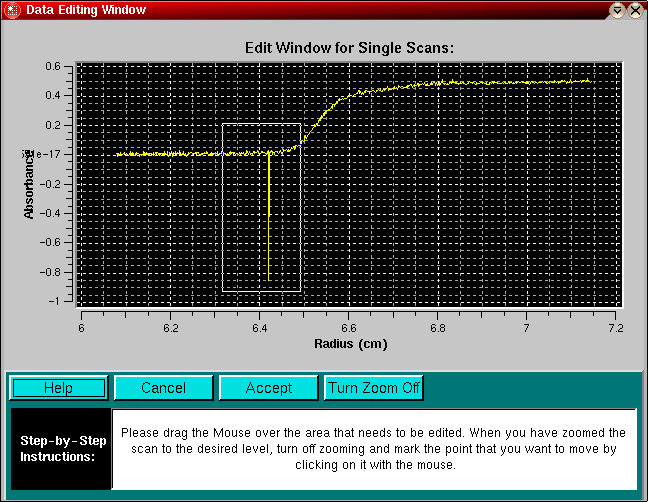
Once you found the appropriate scan, click on the "Edit Single Scan" button, which will bring up a window showing the selected scan by itself. Use the mouse to drag a box around the problem area. Releasing the mouse will rescale the graph within the limits of the bounding box created earlier. This process can be repeated until the desired zoom level is attained. Note: the program will automatically autoscale the y-axis, therefore it is not necessary to include everything in the y-axis frame. Only the x-limits are relevant.
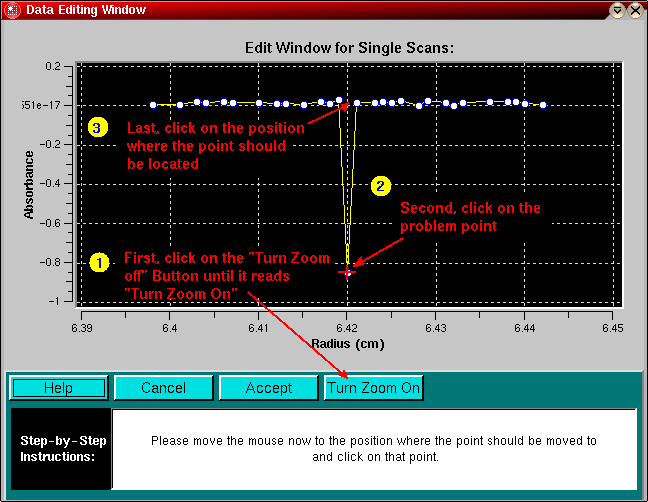
Once the desired zoom level is reached, the zoom function has to be turned off by clicking on the "Turn Zoom Off" button. You can also turn zooming back on to further enhance the problem region, but the zooming has to be turned off before you can select the problem point with the mouse.
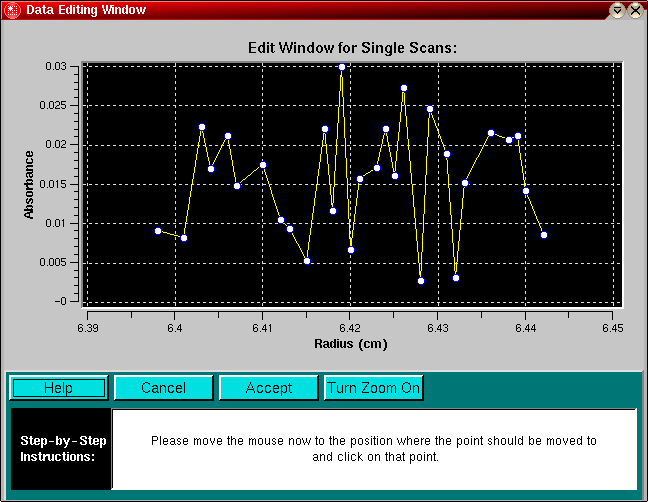
Next, you can click with the mouse near the problem point and it will be highlighted with red crosshairs. Find the position that the problem point should be located, point to it with the mouse and click. You can click as many times as you want until you are satisfied with the new location of the point. Note: Each time you move the point, the plot area will be autoscaled to best distribute the points on the available screensize, which may lead to a somewhat jagged appearance of the points. Once they are re-scaled to their proper dimension, they will appear normally again. Once you have found the optimal position for the point, click on the Accept button. This will return you to the main editing screen, which will now display the corrected scan.
This document is part of the UltraScan Software Documentation
distribution.
Copyright © notice.
The latest version of this document can always be found at:
Last modified on January 12, 2003.